A rich, glossy sauce doesn’t always need flour, cornstarch, or cream. Sometimes all it needs is a little evaporation. Learn how to reduce a sauce properly, how long it takes, when to lower the heat, and how to prevent your beautiful pan sauce from becoming too thick, salty, bitter, or greasy.
There are few things more disappointing than spending an afternoon preparing a wonderful dinner, only to discover that the sauce tastes like diluted soup.
I remember watching my French mother deal with this problem when I was growing up.
She never seemed particularly concerned.
If a sauce was too thin, she’d remove the lid, turn up the heat slightly, and let it bubble away while she finished preparing the rest of the meal.
Every now and then, she’d stir it, taste a little, and make some small adjustment.
And somehow, that watery liquid would gradually become something completely different.
Richer.
Darker.
Fuller in flavor.
Sometimes she’d finish it with a little cold butter, giving the sauce a beautiful sheen.
I thought she was performing some complicated French culinary technique.
And, in a way, she was.
It’s called reducing a sauce.
But the basic principle is surprisingly straightforward.
Once you understand it, you’ll be able to improve everything from a simple tomato sauce to a classic red wine reduction.
And you’ll know when to stop before all that wonderful flavor turns into something unpleasant.
What Does It Mean to Reduce a Sauce?
Reducing a sauce means simmering or gently boiling a liquid so that some of its water evaporates.
As the water escapes as steam, many of the dissolved and suspended ingredients become more concentrated.
That includes salt, sugars, acids, gelatin, and various flavor compounds.
The sauce decreases in volume, and its taste usually becomes more intense.
Depending on what’s in the sauce, its texture may also become thicker.
For example, a rich chicken stock containing gelatin can develop a beautiful, lightly sticky consistency as it reduces.
A tomato sauce becomes thicker partly because water evaporates and the tomato solids become more concentrated.
But reducing plain water won’t magically turn it into a sauce.
There must be something in the liquid to create flavor and body.
That’s one of the most important things to understand.
What Happens When a Sauce Reduces?
Imagine you have 2 cups (480 ml) of unsalted chicken stock.
You pour it into a wide saucepan and allow it to simmer uncovered.
After some time, half the water has evaporated.
You’re left with approximately 1 cup (240 ml).
The stock now contains roughly the same amount of nonvolatile dissolved material in half the liquid.
That means its flavor can become noticeably more concentrated.
If it contains enough gelatin, it may also develop a fuller texture.
But there’s something else happening.
If the stock contained salt, that salt hasn’t disappeared with the steam.
Its concentration has increased too.
And this explains one of the most common mistakes people make when reducing sauces.
They season the liquid too heavily before reducing it.
A sauce that tastes perfectly seasoned at the beginning can become unpleasantly salty after half the water has evaporated.
We’ll come back to that in a moment.
Reducing vs. Thickening vs. Deglazing: What’s the Difference?
These techniques are related, but they aren’t interchangeable.
| Technique | What happens | Main purpose |
|---|---|---|
| Reducing | Water evaporates | Concentrates flavor and may build body |
| Thickening | Flour, starch, or another ingredient increases viscosity | Creates a thicker texture |
| Deglazing | Liquid releases browned deposits from a pan | Recovers flavorful fond |
| Emulsifying | Fat droplets become dispersed in a water-based liquid, or vice versa | Creates a smooth, cohesive texture |
You can use several of these techniques in the same sauce.
For example, after cooking a chicken breast, you might deglaze the pan with white wine.
Next, you reduce the wine and add some stock.
You allow the stock to reduce until its flavor becomes concentrated.
Finally, you whisk in a little cold butter to give the sauce a smooth finish.
That’s deglazing, reducing, and emulsifying in one preparation.
And it’s the foundation of countless restaurant-quality pan sauces.
The Best Pan for Reducing a Sauce
The shape of the pan matters more than you might expect.
A wide saucepan or sauté pan usually reduces liquid faster than a tall, narrow pot.
Why?
Because evaporation takes place at the surface.
The greater the exposed surface area, the more opportunity water has to escape into the air.
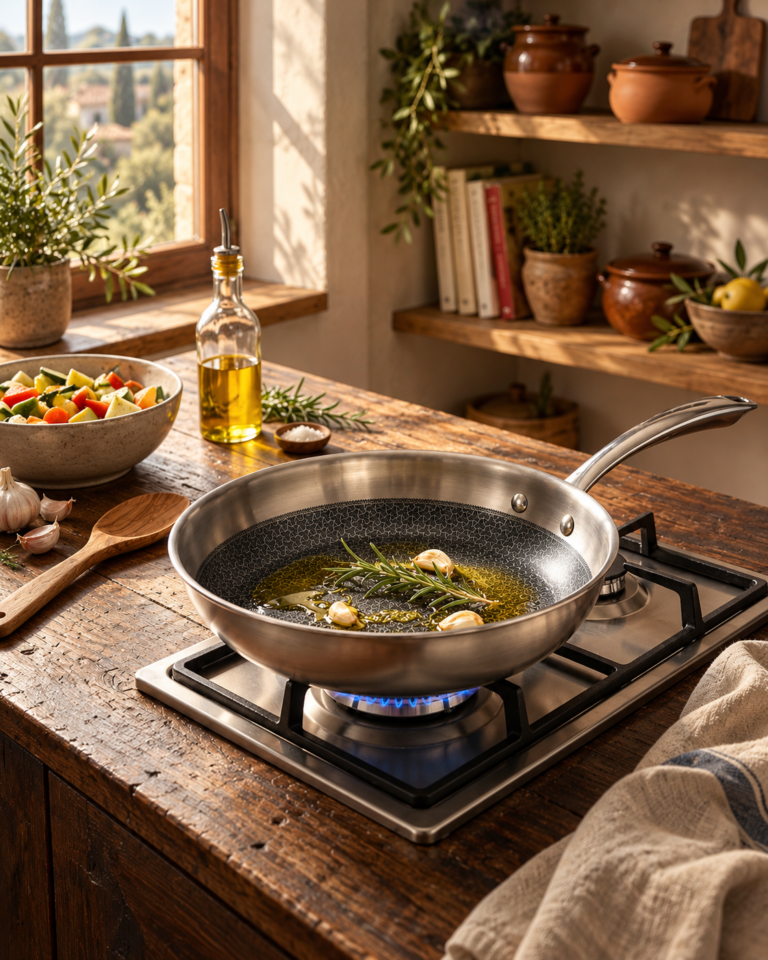
For a small pan sauce, I prefer a stainless steel sauté pan or a wide, heavy-bottomed saucepan.
Stainless steel allows you to monitor the color of the sauce, and a good heavy base helps distribute heat more evenly.
For larger quantities of tomato sauce or stock, a wide, heavy pot works beautifully.
A tall saucepan isn’t wrong.
It simply gives the liquid less exposed surface area, so the process may take longer.
Whatever pan you use, keep the lid off while reducing.
Otherwise, much of the evaporated water will condense against the lid and fall back into the sauce.
What Heat Should You Use to Reduce a Sauce?
For most sauces, start with a gentle to moderate simmer.
You should see bubbles breaking regularly across the surface, but the sauce shouldn’t be erupting violently from the pan.
The exact heat depends on what you’re reducing.
A thin stock can tolerate more vigorous simmering than a delicate cream sauce.
A tomato sauce needs occasional stirring to prevent its solids from catching on the bottom.
A wine reduction may begin at a lively simmer, then need gentler heat as the volume decreases.
And a butter-finished sauce generally shouldn’t be boiled aggressively after the butter has been incorporated.
The important thing is learning to adjust the heat as the sauce changes.
Reducing isn’t simply turning the burner to its highest setting and walking away.
How to Reduce a Sauce: Step by Step
Let’s begin with a straightforward stock-based sauce.
This method works well for many pan sauces and braising liquids.
Step 1: Choose Your Liquid
Start with approximately 2 cups (480 ml) unsalted or low-sodium stock.
You can use chicken, beef, or vegetable stock, depending on the dish.
A gelatin-rich stock will usually produce a fuller, more naturally glossy sauce than a very thin, low-solids stock.
If you’re starting with the cooking juices from a braise, skim away excess fat and strain the liquid if necessary.
Step 2: Use a Wide Pan
Pour the liquid into a wide, heavy-bottomed saucepan.
Make a note of the initial depth.
You can even use a clean wooden skewer to mark the liquid level if you want to track the reduction precisely.
Leave the pan uncovered.
Step 3: Bring It to a Simmer
Set the pan over medium to medium-high heat.
Once the liquid begins simmering, adjust the burner to maintain steady bubbling.
You want water to evaporate without the liquid splattering excessively or burning around the edges.
Step 4: Reduce the Volume
Allow the liquid to simmer until it has decreased to approximately half its original volume.
For 2 cups (480 ml), that means reducing it to around 1 cup (240 ml).
Depending on your pan and heat source, this might take roughly 10–25 minutes, but don’t rely on the clock.
A narrow pan may take considerably longer.
The volume matters more than the time.
Step 5: Check the Consistency
Dip a clean spoon into the liquid.
Does it coat the spoon lightly?
Does it still run off almost like water?
Some stocks will become noticeably thicker as they reduce.
Others may remain relatively thin even when their flavor is concentrated.
That’s normal.
If the liquid lacks gelatin or other ingredients that provide body, further reduction may simply make it too intense or salty without creating the texture you’re looking for.
Step 6: Taste and Adjust
Now taste the sauce.
Only after reducing should you decide how much salt it needs.
You may also want a little lemon juice, vinegar, black pepper, or fresh herbs.
Make adjustments in small amounts.
Remember that a reduced sauce should taste concentrated, but not overpowering.
Step 7: Finish the Sauce
For a richer finish, remove the pan from the heat and whisk in a little cold unsalted butter.
For approximately 1 cup (240 ml) of reduced stock, start with 1 tablespoon (14 g).
This can add a glossy appearance and a more rounded mouthfeel.
You don’t need butter in every sauce.
But for a classic French-style pan sauce, it’s a lovely finishing technique.
What Does ‘Reduce by Half’ Actually Mean?
You’ll see this instruction in countless recipes.
It simply means evaporating enough liquid that approximately half the starting volume remains.
For example:
| Starting quantity | Reduce by half | Reduce by two-thirds |
|---|---|---|
| 1 cup (240 ml) | ½ cup (120 ml) remains | ⅓ cup (80 ml) remains |
| 2 cups (480 ml) | 1 cup (240 ml) remains | ⅔ cup (160 ml) remains |
| 3 cups (720 ml) | 1½ cups (360 ml) remains | 1 cup (240 ml) remains |
| 4 cups (960 ml) | 2 cups (480 ml) remain | 1⅓ cups (320 ml) remain |
This is about volume, not cooking time.
And remember that a half reduction doesn’t necessarily produce a sauce thick enough to coat a spoon.
That depends on the ingredients.
How Do You Know When a Sauce Has Reduced Enough?
This is where cooking becomes a little more intuitive.
There are three useful tests.
1. The Volume Test
If your recipe specifies a reduction by half or by one-third, compare the remaining volume with the starting quantity.
This is often the most reliable method.
2. The Spoon Test
Dip a spoon into the sauce and lift it out.
If the sauce lightly coats the back, draw a line through it with a clean finger once it’s cool enough to touch safely.
If the line remains visible instead of immediately flowing closed, the sauce has developed some body.
In classical French cooking, a sauce that coats food or a spoon is often described as having a nappé consistency.
But not every reduced sauce needs to reach this stage.
A thin, concentrated jus can be delicious without becoming thick.
3. The Taste Test
Taste the sauce at intervals as it reduces.
Does it taste fuller and more balanced?
Or is it becoming overly salty, sour, bitter, or sweet?
Flavor matters just as much as consistency.
The best sauce isn’t necessarily the thickest one.
It’s the one that tastes right.
How to Reduce a Red Wine Sauce
Red wine reductions are one of the best ways to understand this technique.
When wine is gently simmered, water and volatile compounds evaporate, while many flavor components become more concentrated.
The result can be rich and complex.
But poorly controlled reductions can become unpleasantly acidic, bitter, or harsh.
I prefer using a dry red wine with moderate tannins.
A Grenache, Merlot, or relatively soft Pinot Noir can work beautifully.
Very heavily oaked or strongly tannic wines may become less pleasant when concentrated.
And don’t assume that a wine reduction becomes entirely alcohol-free. Some alcohol may remain, depending on the ingredients and cooking method.
My Simple French Red Wine Reduction
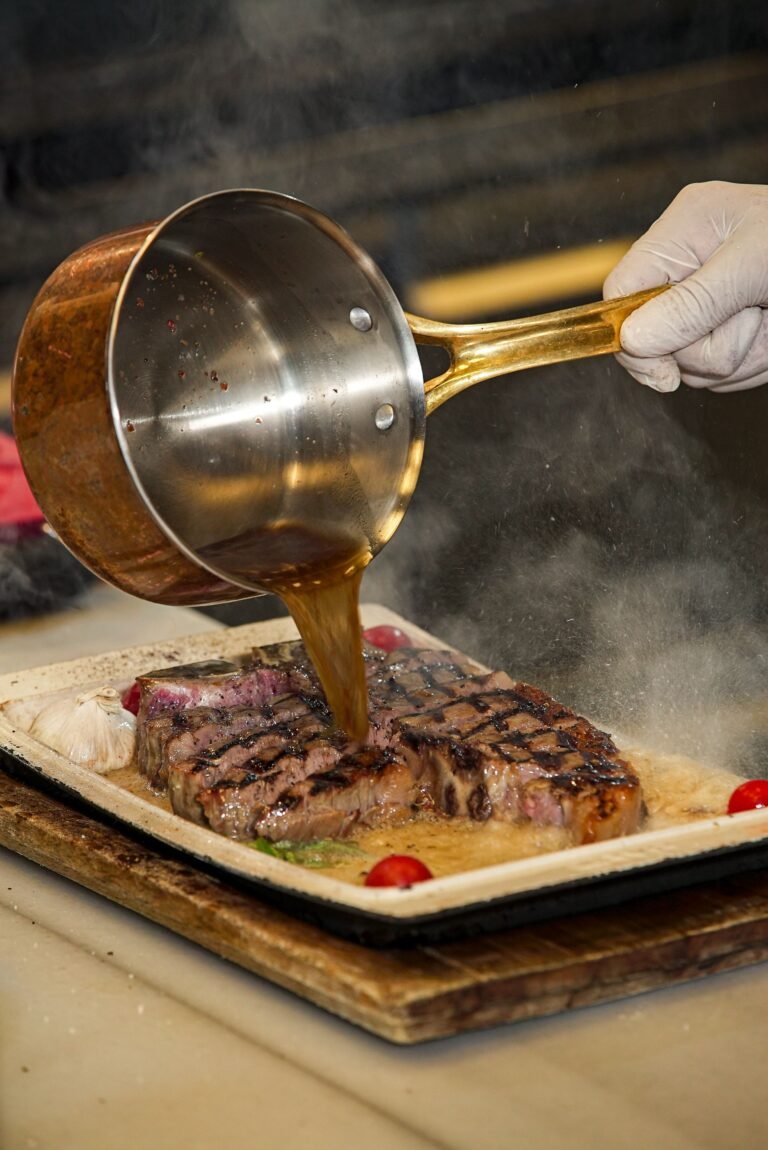
This is a practical sauce to serve with steak, roast beef, duck, or mushrooms.
It isn’t a complete demi-glace, and it doesn’t pretend to be.
It’s a straightforward homemade red wine sauce using the reduction technique.
Preparation time: 5 minutes
Cooking time: Approximately 15–25 minutes
Yield: About ½ cup (120 ml), enough for 2–3 small sauce portions
Ingredients
- 1 cup (240 ml) dry red wine
- ½ cup (120 ml) unsalted beef stock, preferably gelatin-rich
- 1 small shallot, finely minced (approximately 25 g)
- 1 tsp (5 ml) extra virgin olive oil
- 1 small sprig fresh thyme
- 1 tbsp (14 g) cold unsalted butter
- Freshly ground black pepper
- Fine sea salt, to taste
Step 1: Soften the Shallot
Heat the olive oil in a wide stainless steel saucepan over medium-low heat.
Add the minced shallot.
Cook for approximately 2–3 minutes, stirring occasionally, until softened without developing much color.
Step 2: Add the Wine
Pour in the red wine.
Add the thyme.
Bring the liquid to a steady simmer.
Allow it to reduce until approximately ¼ cup (60 ml) remains.
This means reducing the original wine quantity by roughly three-quarters.
It may take around 8–15 minutes in a wide pan, depending on the heat.
Watch the liquid more closely as it approaches the final volume.
Step 3: Add the Stock
Pour in the beef stock.
Return to a simmer and reduce until the sauce has developed a lightly coating consistency.
If the stock is rich in gelatin, it should gradually develop some body.
If you’re using a thin commercial stock, the sauce may remain lighter.
Aim for approximately ½ cup (120 ml) of finished sauce, although the exact final volume can vary.
Step 4: Remove the Thyme
Remove the thyme sprig.
For a smoother restaurant-style result, strain out the shallot as well.
Alternatively, leave the shallot in for a more rustic sauce.
Step 5: Finish with Cold Butter
Remove the pan from the heat.
Add the cold butter in small pieces.
Whisk or swirl until fully incorporated and glossy.
Avoid returning the sauce to a vigorous boil after adding the butter.
Step 6: Taste and Serve
Season with black pepper.
Taste carefully before adding any salt.
If the sauce is too sharp, a little additional unsalted stock may soften it.
If it has become too concentrated, stir in a tablespoon or two of water.
Serve immediately with steak, duck, roasted mushrooms, or another suitable dish.
How to Reduce a Tomato Sauce
Tomato sauces behave differently from stock reductions because they already contain suspended tomato solids and natural pectin.
As water evaporates, those solids become more concentrated and the texture becomes thicker.
For a basic tomato sauce, use a wide saucepan over medium-low to medium heat.
Leave the lid off and stir periodically.
If the sauce begins sputtering, lower the heat.
Depending on the tomatoes and quantity, you may need 20–45 minutes or longer.
A sauce made from watery fresh tomatoes generally takes longer to thicken than one made with concentrated canned tomatoes.
And remember that reducing a tomato sauce also concentrates its acidity and salt.
Taste towards the end before making final adjustments.
How to Reduce a Cream Sauce Without Splitting It
Cream sauces need more careful heat control.
Heavy cream contains fat and milk proteins, and its texture changes as water evaporates.
You can reduce heavy cream to create a richer, thicker sauce.
But aggressive boiling, particularly in combination with acidic ingredients, increases the risk of separation or scorching.
Use a heavy-bottomed saucepan and maintain a gentle simmer.
Stir regularly.
For approximately 1 cup (240 ml) of heavy cream, begin checking the consistency after about 5 minutes.
The total time depends on your pan, the cream’s fat content, and how thick you want the sauce.
Avoid reducing low-fat milk as though it were heavy cream.
They behave differently.
If you’re making a delicate lemon cream sauce, add acidic ingredients carefully, generally towards the end, to reduce the risk of curdling.
And once the sauce reaches the desired consistency, remove it from the heat.
Why Is My Reduced Sauce Too Salty?
This is perhaps the most important mistake to avoid.
Salt doesn’t evaporate with the water.
Imagine beginning with 2 cups of stock containing 2 grams of salt.
If you reduce that stock to 1 cup, those 2 grams of salt are still present, but in half the volume.
The result tastes more concentrated.
And if your sauce also contains salted butter, cured meat, cheese, or salty cooking juices, the effect can be even greater.
The solution is simple.
Use unsalted or low-sodium liquids whenever you know you’ll be reducing them significantly.
And season towards the end.
Can You Fix an Overly Salty Reduction?
Sometimes.
If the sauce is only slightly too salty, add a small amount of unsalted water, stock, or cream, depending on the recipe.
This dilutes the salt concentration.
But there’s a catch.
Adding liquid also dilutes the other flavors.
If the sauce has become extremely salty, you may need to make a new batch of unsalted sauce and combine the two.
Adding sugar, vinegar, or lemon juice may change the way saltiness is perceived, but none of those ingredients actually removes salt.
And adding a potato doesn’t reliably remove excess salt from a sauce either.
Prevention is much easier than rescue.
Why Is My Reduction Too Bitter?
Bitterness can develop for several reasons.
Perhaps the fond in the pan was burnt before you added the liquid.
Maybe the wine had strong tannins that became unpleasantly concentrated.
Or the sauce was reduced too aggressively and scorched around the edges.
Certain herbs and spices can also create bitterness when overextracted or burned.
If the sauce has a distinctly burnt flavor, the best solution is usually to start again.
Diluting a burnt sauce may reduce its intensity, but it won’t eliminate the underlying problem.
For a wine reduction that’s simply a little too intense, additional unsalted stock or a small quantity of butter may help restore balance.
How to Fix a Sauce That’s Too Thick
This one is usually straightforward.
Add a small amount of liquid.
For a savory stock-based sauce, start with 1 tablespoon (15 ml) of unsalted stock or water.
Whisk and check the consistency.
Repeat if necessary.
For a tomato sauce, a little water or reserved pasta water may be appropriate.
For a cream sauce, add a small quantity of cream or milk, gently warming and stirring until smooth.
Don’t add a large amount all at once.
It’s much easier to thin a sauce gradually than to reduce it all over again.
Why Isn’t My Sauce Getting Thicker?
Not every liquid thickens significantly through reduction.
A well-made gelatin-rich stock can become glossy and lightly syrupy.
A thin vegetable broth may become more intensely flavored without developing much body.
If your sauce tastes concentrated enough but remains watery, further reducing it may only make the flavor too strong.
At that point, consider another technique.
A small cornstarch slurry can provide thickening.
A roux is useful for gravies and more substantial sauces.
Cold butter can improve the texture and mouthfeel of certain pan sauces, although it won’t turn a large quantity of watery broth into a thick gravy.
The important thing is knowing what result you want.
Sometimes you need concentration.
Sometimes you need thickening.
And sometimes you need both.
How to Thicken a Sauce with Cornstarch
If you’ve reduced a sauce as far as its flavor allows but still want a slightly thicker texture, cornstarch can be useful.
For approximately 1 cup (240 ml) of sauce, start with:
- 1 tsp (approximately 3 g) cornstarch
- 1 tbsp (15 ml) cold water
Mix the cornstarch and cold water until smooth.
Bring the sauce to a gentle simmer.
Stir in a little slurry at a time.
Allow it to return to a simmer briefly so the starch thickens.
Stop when you’ve reached the desired consistency.
You may not need all the slurry.
Avoid sprinkling dry cornstarch directly into hot sauce, as it can form lumps.
And don’t continue boiling cornstarch-thickened sauces unnecessarily for long periods, because their texture can deteriorate.
Five Common Sauce Reduction Mistakes
1. Using a Pan That’s Too Narrow
A wide pan exposes more liquid to the air and usually speeds up evaporation.
2. Salting Too Early
Salt becomes more concentrated as the liquid reduces.
Make final seasoning adjustments towards the end.
3. Using High Heat for Every Sauce
Stock and wine can tolerate a more active simmer than delicate cream or butter-finished sauces.
Adjust the heat to the ingredients.
4. Walking Away Near the End
As the liquid becomes shallow, it can scorch quickly.
Stay near the stove, especially during the final minutes.
5. Reducing Past the Point of Good Flavor
A sauce isn’t automatically better because it’s thicker or darker.
Stop when the flavor and texture are balanced.
Can You Reduce a Sauce in Advance?
Yes.
In fact, preparing a reduction ahead of time can make dinner much easier.
Many stock-based reductions and tomato sauces can be prepared in advance.
Cool them promptly in shallow containers and refrigerate at 4°C (40°F) or below.
Use refrigerated leftovers within 3–4 days, or freeze suitable sauces for longer storage.
For butter-emulsified sauces, I generally prefer preparing the reduction in advance and adding the butter shortly before serving.
That gives you more control over the final texture.
When reheating, use gentle heat and stir as needed.
You may need a splash of water or stock because sauces often thicken as they cool.
When I Use Reduction in My Mediterranean Kitchen
I probably reduce something almost every day without giving it much thought.
A tomato sauce for pasta.
A little white wine after cooking chicken.
The cooking juices from a slow-braised stew.
A sherry sauce for mushrooms.
Or a small saucepan of stock that needs a little more depth before becoming part of dinner.
And I love the way this simple technique connects so many Mediterranean cuisines.
In France, reductions are central to countless classical sauces.
In Italy, reducing tomatoes and finishing pasta in its sauce can create wonderful depth and texture.
In Spain, reduced cooking juices are an important part of many meat, seafood, and vegetable dishes.
Different cuisines use the technique in different ways, but the basic principle remains the same.
Allow moisture to evaporate.
Pay attention to the concentration of flavor.
And stop when the sauce tastes exactly as you want it to.
The Difference Between Following a Recipe and Understanding a Sauce
A few evenings ago, I was preparing a red wine sauce in our farmhouse kitchen.
Sam wandered in while I was standing over the stove, watching a small saucepan bubble away.
“Is dinner ready?” he asked.
“Almost. I’m just reducing the sauce.”
He looked at the pan.
“It doesn’t look like there’s much left.”
And that, of course, was rather the point.
I explained that the liquid was becoming more concentrated, and that I was waiting for the right balance of flavor and texture.
He nodded politely.
Then he asked whether there would be enough for his steak.
A perfectly reasonable concern, actually.
Because it’s possible to become so enthusiastic about reducing a sauce that you end up with three tablespoons of something delicious when you needed enough for four people.
And that’s another lesson worth remembering.
Good sauce-making is about balance.
Not just the balance of flavors, but the balance between concentration, texture, and the amount you actually want to serve.
These days, whenever I reduce a sauce, I think about my mother in our American kitchen.
She didn’t need an elaborate explanation for what she was doing.
She understood her ingredients.
She watched the pan.
And she knew when the sauce was ready.
That’s the skill I hope you’ll develop too.
Not simply learning how to boil liquid away.
But understanding how to transform it into something delicious.