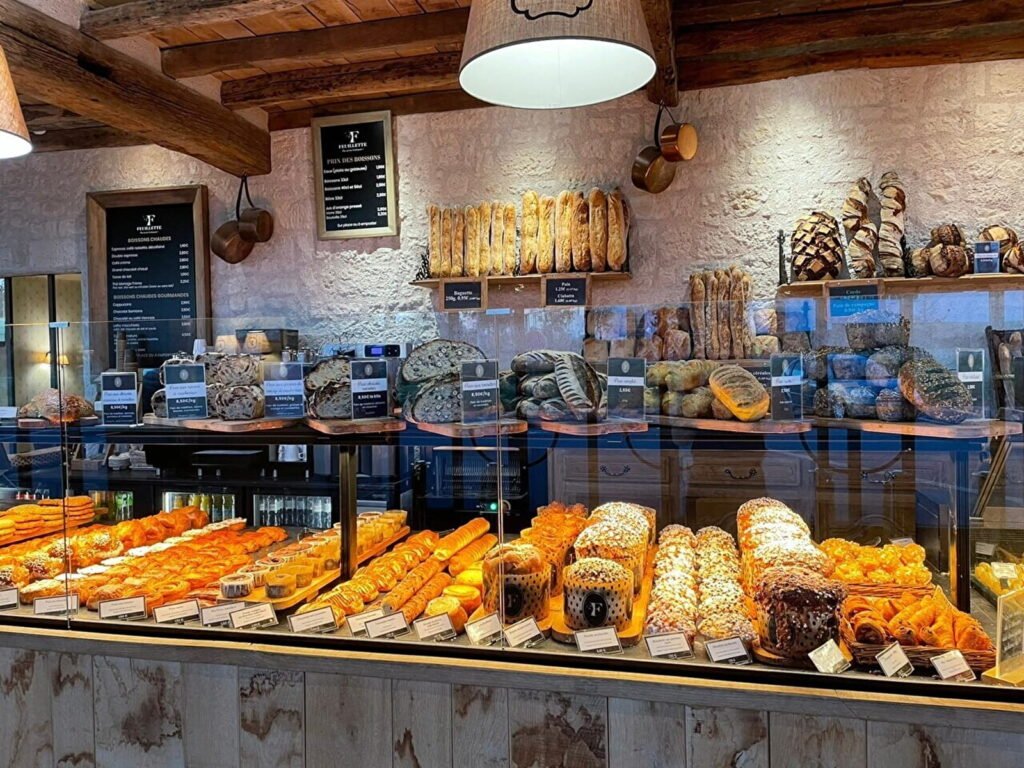
Whenever Sam and I travel through France, there’s one bakery we find particularly difficult to resist: Feuillette.
If you’ve ever visited one of their beautiful French bakeries, you’ll understand why. The counters are filled with wonderful pastries, cakes, breads and all sorts of things that make choosing just one almost impossible.
We often stop for coffee, and somehow we usually leave with a little bag of something delicious for the journey.
I also have a cookbook by Jean-François Feuillette, and one of the recipes I was particularly excited to try was his madeleines.
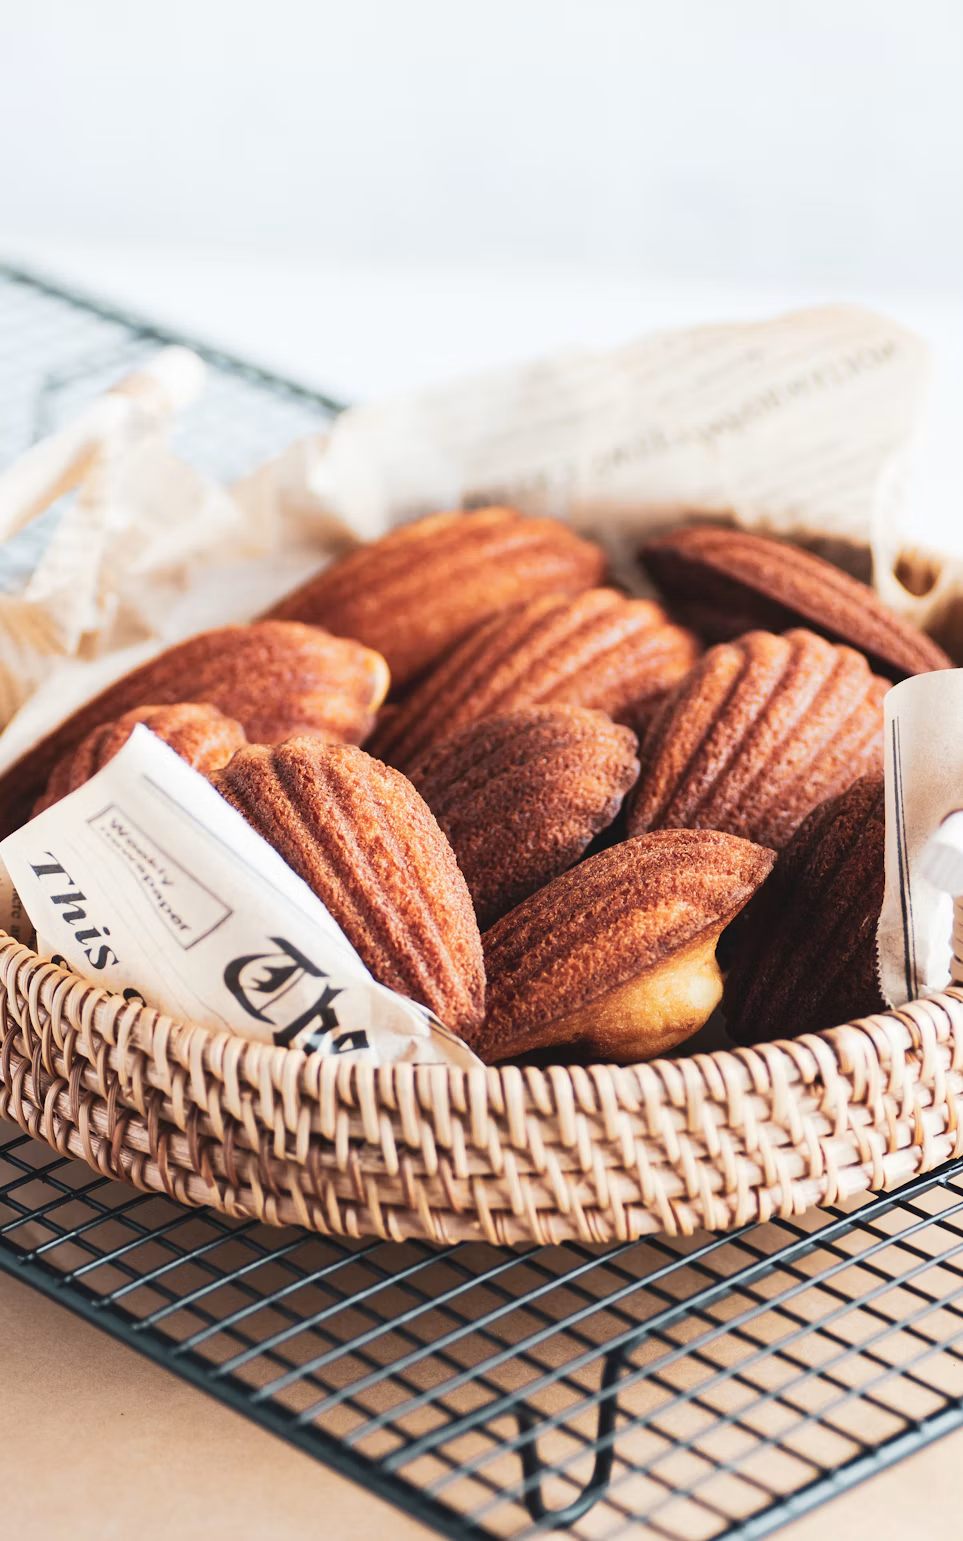
Those lovely little French cakes with their delicate shell pattern on one side and that wonderful rounded hump on the other.
The Secret to the Perfect Madeleine Hump
The interesting thing about this recipe is that you prepare the batter the day before baking.
It rests in the refrigerator for twelve hours, giving the flour time to hydrate and the butter time to firm up.
Then the cold batter goes into a hot oven.
That temperature difference helps create the characteristic rise that French bakers call la bosse.
I remember being rather pleased when I made them for the first time. They developed those beautiful little humps, just as I’d hoped.
The texture, however, wasn’t quite what I wanted, so I’ve been experimenting with the flour quantity to achieve a slightly more traditional, tender crumb.
Honey, Butter and Vanilla
These madeleines are flavored with honey and real vanilla, which gives them a lovely aroma without needing any elaborate decoration.
I like them best when they’re still slightly warm from the oven, with a cup of coffee.
You can also fill them with a little homemade caramel, pistachio cream or chocolate spread, although they’re perfectly delicious just as they are.
And perhaps that’s what I love most about French baking. Something as small and simple as a madeleine can still feel rather special.
French Honey and Vanilla Madeleines – With the Perfect Hump
These French honey and vanilla madeleines are buttery little sponge cakes with delicate golden edges and a beautifully rounded hump. Inspired by a recipe from French pastry chef François Feuillette, the batter rests overnight before baking for a soft, tender crumb and that classic French madeleine shape.
The day before baking, place the eggs and sifted powdered sugar in a large mixing bowl. Beat with an electric mixer for approximately 3–4 minutes, until the mixture becomes pale, thick and slightly fluffy.
Place the milk and honey in a small saucepan. Warm gently to approximately 50°C (122°F), stirring until the honey has dissolved into the milk. The mixture should be warm, not boiling.
Slowly pour the warm honey and milk mixture into the beaten eggs while mixing gently on low speed.
Sift the flour together with the baking powder. Gradually add the dry ingredients to the egg mixture, stirring just until combined and no dry flour remains.
Melt the butter in a small saucepan or microwave and allow it to cool until warm rather than hot.
Pour the melted butter into the batter in several additions, stirring gently until fully incorporated.
Add the fine sea salt and the seeds scraped from the vanilla bean. Mix until the batter is smooth and evenly combined, without overworking it.
Cover the bowl tightly and refrigerate the batter for 12 hours, preferably overnight.
The following day, preheat the oven to 180°C (355°F), conventional setting, or approximately 160°C (320°F) fan. Allow the oven to heat thoroughly before baking.
Lightly butter a metal madeleine pan and dust with flour, tapping out the excess. If using a traditional metal pan and following Feuillette’s method, warm the prepared pan briefly in the oven before filling it, taking care when handling the hot metal.
Remove the cold batter from the refrigerator and transfer it to a piping bag. Fill each madeleine cavity approximately three-quarters full. Do not spread the batter flat; it will settle as it bakes.
Place the pan in the preheated oven and bake until the madeleines have risen, developed their characteristic hump and turned golden around the edges. Begin checking standard-sized madeleines after 9–10 minutes. They may need approximately 10–15 minutes, while larger patisserie-sized madeleines may require up to 18 minutes.
The madeleines are ready when the centers spring back gently when touched and a toothpick inserted into the thickest part comes out without wet batter.
Remove the pan from the oven. Allow the madeleines to stand for approximately 1 minute, then carefully release them from the molds and transfer to a wire rack.
If baking in batches, keep the remaining batter refrigerated. Reprepare the pan between batches, making sure it is clean and lightly greased.
Serve the madeleines slightly warm or at room temperature. If you wish to fill them, make a small opening in the underside of each cooled madeleine and pipe in a little caramel, pistachio cream, chocolate spread or fruit preserves.
Notes
Use a kitchen scale: Accurate measurements are particularly important when baking madeleines. Weigh the flour, butter, honey and sugar for consistent results.Choose good honey: Use a mild, floral honey that complements the vanilla. Orange blossom honey is particularly lovely, but any good-quality mild honey will work.Vanilla: A whole vanilla bean gives these madeleines a beautiful aroma. If necessary, substitute approximately 2 teaspoons of good-quality vanilla extract.
How to Get the Perfect Hump on French Madeleines
The famous little hump on the back of a madeleine is called la bosse in French.It’s one of the things that makes these small cakes so recognizable.A good madeleine should have a delicate shell pattern on one side and a lovely rounded rise on the other.But how do French pastry chefs achieve that shape?
1. Rest the Batter Overnight
One of the most important steps is allowing the batter to rest in the refrigerator.In François Feuillette’s recipe, the batter rests for twelve hours.During that time, the flour absorbs moisture, the butter firms up and the mixture becomes thoroughly chilled.This helps create a more consistent batter and can contribute to the characteristic rise during baking.I like preparing the batter in the evening so it’s ready to bake the next morning.
2. Use a Properly Heated Oven
Madeleines need enough heat to rise before the outer structure sets.When the cold batter enters the hot oven, the gases produced by the baking powder expand, the air already trapped in the batter expands, and steam develops.Together, these help the center rise.The precise oven temperature depends on the recipe and the size of your madeleine pan, so it’s worth testing your own oven.
3. Choose a Metal Madeleine Pan
I prefer traditional metal madeleine pans because they conduct heat efficiently and give the cakes beautifully defined shell patterns.Silicone molds can work, but the edges may not brown in quite the same way.Feuillette’s method involves preheating the madeleine pan before adding the cold batter.Other French baking methods use a chilled mold instead. Both approaches can produce a hump, so the important thing is to follow a consistent method and find what works best in your oven.
4. Don’t Fill the Molds Too Much
Madeleine batter needs room to expand.Fill the cavities approximately three-quarters full.There’s no need to spread the batter carefully into every corner. It will settle as the pan heats up.Overfilled molds can spill over the sides and produce uneven shapes.
5. Don’t Overbake Them
Madeleines are small cakes, so a few extra minutes in the oven can make a noticeable difference.Look for golden edges, a gently domed center and a soft, springy texture.They should be tender inside, not dry or crumbly.
Why Are My Madeleines Dense?
There are several possible explanations.Too much flour can make the crumb heavy, while too little flour can leave the cake without enough structure.Overmixing after adding the flour can also affect the texture.And if the baking powder is old or the batter hasn’t been handled correctly, the madeleines may not rise as expected.That’s why I prefer weighing ingredients carefully and testing one batch before changing several things at once.
Can You Fill French Madeleines?
Absolutely.François Feuillette suggests a variety of fillings, including fruit preserves, praline and caramel.I particularly like the idea of a little salted caramel inside a honey and vanilla madeleine.You can also use pistachio cream, chocolate hazelnut spread or a thick fruit jam.Make a small opening underneath the cooled cake with a narrow piping nozzle, then add just enough filling to give the madeleine a little surprise in the center.Of course, there’s nothing wrong with leaving them plain.A beautifully baked honey and vanilla madeleine is already delicious without anything added.
Can You Make Madeleine Batter the Day Before?
Yes, and for this recipe, you should!Prepare the batter the evening before and refrigerate it for twelve hours.The next day, all you need to do is prepare your madeleine pan, preheat the oven and bake.It’s a lovely way to have freshly baked French madeleines ready for morning coffee without spending much time in the kitchen.Melted butter: Allow the butter to cool slightly before adding it to the batter. It should still be liquid but not hot.Resting time: Refrigerate the batter for 12 hours. This allows the flour to hydrate and the batter to chill thoroughly before baking.The madeleine hump: Cold batter placed in a thoroughly heated oven encourages the characteristic rounded hump. The exact result also depends on the batter consistency, raising agent, mold and baking temperature.Madeleine molds: Metal pans usually produce sharper shell patterns and more defined golden edges than silicone molds. I have silicone molds and for me there ok.Filling the molds: Fill each cavity approximately three-quarters full. Overfilling may cause the batter to spread over the edges.Baking: Begin checking standard-sized madeleines after approximately 9–10 minutes. Larger madeleines may need longer. The centers should spring back gently and the edges should be lightly golden.Filled madeleines: Allow the cakes to cool before adding a small amount of caramel, pistachio cream or chocolate spread. Avoid overfilling.Serving: Madeleines are at their best on the day they are baked, especially while still slightly warm.Storage: Store unfilled madeleines in an airtight container at room temperature for up to 2 days. Refrigerate madeleines filled with perishable creams and follow the filling’s storage requirements.Freezing: Freeze unfilled, completely cooled madeleines in an airtight container for up to 2 months for best quality.
French Honey and Vanilla Madeleines – With the Perfect Hump
Ingredients
**For the madeleines**
200g14 tbsp unsalted butter, melted
245gapproximately 2 cups all-purpose flour
120g1 cup powdered sugar, sifted
10g2½ tsp baking powder
4large eggs
130gapproximately ⅓ cup + 2 tsp honey
75g5 tbsp whole milk
3g½ tsp fine sea salt
1vanilla bean (split lengthwise and seeds scraped)
**For preparing the madeleine pan**
A little softened butter
A little all-purpose flour
**Optional fillings**
Homemade salted caramel
Pistachio cream
Chocolate hazelnut spread
Fruit preserves
1
The day before baking, place the eggs and sifted powdered sugar in a large mixing bowl. Beat with an electric mixer for approximately 3–4 minutes, until the mixture becomes pale, thick and slightly fluffy.
2
Place the milk and honey in a small saucepan. Warm gently to approximately 50°C (122°F), stirring until the honey has dissolved into the milk. The mixture should be warm, not boiling.
3
Slowly pour the warm honey and milk mixture into the beaten eggs while mixing gently on low speed.
4
Sift the flour together with the baking powder. Gradually add the dry ingredients to the egg mixture, stirring just until combined and no dry flour remains.
5
Melt the butter in a small saucepan or microwave and allow it to cool until warm rather than hot.
6
Pour the melted butter into the batter in several additions, stirring gently until fully incorporated.
7
Add the fine sea salt and the seeds scraped from the vanilla bean. Mix until the batter is smooth and evenly combined, without overworking it.
8
Cover the bowl tightly and refrigerate the batter for 12 hours, preferably overnight.
9
The following day, preheat the oven to 180°C (355°F), conventional setting, or approximately 160°C (320°F) fan. Allow the oven to heat thoroughly before baking.
10
Lightly butter a metal madeleine pan and dust with flour, tapping out the excess. If using a traditional metal pan and following Feuillette's method, warm the prepared pan briefly in the oven before filling it, taking care when handling the hot metal.
11
Remove the cold batter from the refrigerator and transfer it to a piping bag. Fill each madeleine cavity approximately three-quarters full. Do not spread the batter flat; it will settle as it bakes.
12
Place the pan in the preheated oven and bake until the madeleines have risen, developed their characteristic hump and turned golden around the edges. Begin checking standard-sized madeleines after 9–10 minutes. They may need approximately 10–15 minutes, while larger patisserie-sized madeleines may require up to 18 minutes.
13
The madeleines are ready when the centers spring back gently when touched and a toothpick inserted into the thickest part comes out without wet batter.
14
Remove the pan from the oven. Allow the madeleines to stand for approximately 1 minute, then carefully release them from the molds and transfer to a wire rack.
15
If baking in batches, keep the remaining batter refrigerated. Reprepare the pan between batches, making sure it is clean and lightly greased.
16
Serve the madeleines slightly warm or at room temperature. If you wish to fill them, make a small opening in the underside of each cooled madeleine and pipe in a little caramel, pistachio cream, chocolate spread or fruit preserves.